Tag Archives: recipes

Homemade Maple Vinegar

1 Apr

Dear Yolo,

My absolute favorite thing that came from making homemade red wine vinegar is the one we made after it, maple vinegar. It makes food taste incredible and is fairly easy to make as well. The idea came originally from the book Ideas in Food, which anyone and everyone interested in the process of cooking should read. It is an ongoing experimental process with food by Chefs Aki Kamozawa and H. Alexander Talbot.

You need to start with some really good quality Grade A maple syrup. It’s expensive, but it is the best and substitutions really fall short. The list of the ingredients you’ll need are:

3 1/2 cups homemade red wine vinegar

3 cups grade A maple syrup

1 1/2 cups dark rum (gosling’s or any you approve of)

3/4 cup filtered water

Combine all and store in a dark place for a few weeks. Transfer as needed to a bottle with a pour spout or stopper and use on whatever you like (the recipe makes quit a bit). Maple vinegar can lift an ordinary pork tenderloin to heights of amazingness. I love it on pan roasted carrots and brussels sprouts. It gives many ordinary foods that extra umami flavor.  I’ll post some recipes in the future.

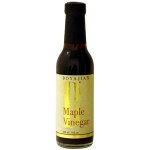
If you don’t feel like going through the process of making your own or you want to try a store-bought version first, you can always buy some at Dean and Deluca:

John Boyajian’s Malple Vinegar $8.50 for 8 oz.

Or you can go the more exotic and gourmet route and purchase some from Mikuni Wild Harvest (all of their products look pretty awesome):

Tonic 03: Maple Matured Sherry Bourbon Oak Vinegar $22.95 for 400ml

Enjoy!

Love,

Yolo

Sunday Roast Chicken

25 Mar Sunday Roast Chicken
Sunday Roast Chicken

Mmmmmmm...

Dear Yolo,

Lately, having roast chicken on Sunday has become a tradition. It’s a healthy, delicious, simple, EASY!  meal and the leftover chicken meat stretches into sandwiches, pastas and snacks for a a few days after.

You’re no stranger to chicken roasting but for those who haven’t tried it, I strongly encourage you to. I know you can buy those ready-to-eat rotisserie chickens at the supermarket but it doesn’t compare to the taste of a chicken you roast yourself. Because there IS a difference in taste (and your peace of mind) I pick the biggest organic, free-range chicken I can find.  It’s a lovely ritual, and the results will make you feel like a kitchen god.

I’m sharing the recipe I use which is Thomas Keller’s Favorite Roast Chicken.  I love how he writes the recipe and how to enjoy the bird. There aren’t many things that feel cozier than enjoying (or sharing) the oysters of a freshly carved chicken. While I usually adapt recipes, I’ve reproduced this in its entirety because you just have to hear it straight from Keller. This is a man who knows how to enjoy a roast chicken.

To keep it healthy, I don’t serve the chicken with butter. We usually enjoy it alongside a salad or a couple of veg dishes.

Thomas Keller’s Favorite Roast Chicken
 from Gourmet Magazine (RIP!)

  • One 2- to 3-pound farm-raised chicken
  • Kosher salt and freshly ground black pepper
  • 2 teaspoons minced thyme (optional)
  • Unsalted butter
  • Dijon mustard

Preheat the oven to 450°F. Rinse the chicken, then dry it very well with paper towels, inside and out. The less it steams, the drier the heat, the better.

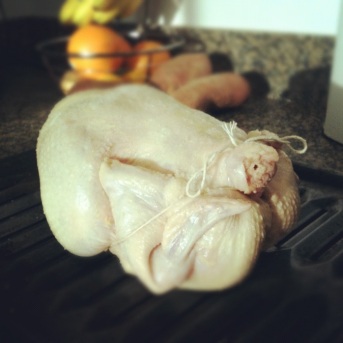
Trussed and ready for the ovenSalt and pepper the cavity, then truss the bird. Trussing is not difficult, and if you roast chicken often, it’s a good technique to feel comfortable with. When you truss a bird, the wings and legs stay close to the body; the ends of the drumsticks cover the top of the breast and keep it from drying out. Trussing helps the chicken to cook evenly, and it also makes for a more beautiful roasted bird. (Click here for a tutorial.)

Now, salt the chicken—I like to rain the salt over the bird so that it has a nice uniform coating that will result in a crisp, salty, flavorful skin (about 1 tablespoon). When it’s cooked, you should still be able to make out the salt baked onto the crisp skin. Season to taste with pepper.

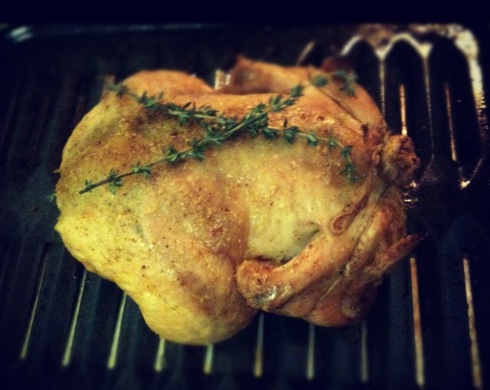
Place the chicken in a sauté pan or roasting pan and, when the oven is up to temperature, put the chicken in the oven. I leave it alone—I don’t baste it, I don’t add butter; you can if you wish, but I feel this creates steam, which I don’t want. Roast it until it’s done, 50 to 60 minutes. Remove it from the oven and add the thyme, if using, to the pan. Baste the chicken with the juices and thyme and let it rest for 15 minutes on a cutting board.

Remove the twine. Separate the middle wing joint and eat that immediately. Remove the legs and thighs. I like to take off the backbone and eat one of the oysters, the two succulent morsels of meat embedded here, and give the other to the person I’m cooking with. But I take the chicken butt for myself. I could never understand why my brothers always fought over that triangular tip—until one day I got the crispy, juicy fat myself. These are the cook’s rewards. Cut the breast down the middle and serve it on the bone, with one wing joint still attached to each. The preparation is not meant to be superelegant. Slather the meat with fresh butter. Serve with mustard on the side and, if you wish, a simple green salad. You’ll start using a knife and fork, but finish with your fingers, because it’s so good. (Click here for a video tutorial on carving a chicken.)

Try and tell me that doesn’t sound good. Enjoy. 🙂

Love,

Maroon

Homemade Red Wine Vinegar

23 Mar Homemade red wine vinegar

Homemade red wine vinegar

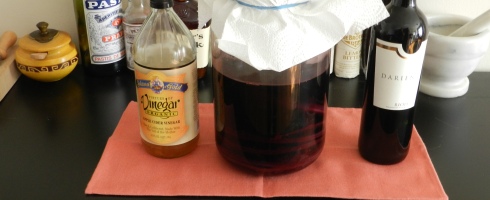
Dear Maroon,I adore homemade vinegars because they usually taste better and after you’ve done it once, it pays for itself. Here’s a recipe for homemade red wine vinegar that can be used in the chimichurri and criolla recipes from an earlier post. It’s pretty damn simple.

Homemade Red Wine Vinegar:

2 cups of apple cider vinegar with the mother (you can find raw apple cider with the mother at health food stores)

3 cups red wine (we use a collection of unfinished bottles of wine from the previous week or two)
1 large glass jar
1 paper towel
1 large rubber band

Combine wine and vinegar in the jar. Cover with the paper towel and secure with the rubber band. Place in a dark, room temperature place (60-80 degrees ideal) for two weeks. Strain and transfer to a glass bottle (I like one with a pour spout). Let stand another week for flavors to mature and mellow. Use as you would any store bought red wine vinegar.

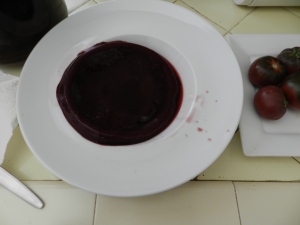
This vinegar is much more pronounced in nuanced flavor than store-bought versions. The real draw in doing this is that you can reserve a portion of the mother (unstrained, don’t be afraid – it looks like a gelatinous mass) and keep adding small batches of wine weekly to have a never-ending supply. Wine recycling!

Love,

Yolo
Here is the gelatinous mass that is the mother of the red wine vinegar:
Red Wine Vinegar Mother

The Finest Meats & Cheeses (mostly meats) Part II

22 Mar The Kavanagh Building. Retiro, Buenos Aires.
Florida Street, the Retiro district of Buenos Aires

Florida Street, the Retiro district of Buenos Aires

Dear Maroon,
My favorite place we went to in Buenos Aires was probably a restaurant called Sipan. It is ridiculously good. It is situated in a boutique hotel in the Palermo district and while a bit pricey, is fucking awesome. You can see sky overhead when not rainy and there’s an entire bright graffitied wall. Our amuse bouche on the first day for lunch was a piece of salmon sashimi over rice with a passion fruit miso glaze. Stupidly good. The ceviches there are literally out of this world. They’re amazing and they have the freshest fish ever with other beautiful sometimes lightly fried fish or octopus, with the best citrus and other components. I’ve had some good ceviche, but holy shit, get a bottle of Torrontes and just sit back and enjoy. We went back the next day. Honestly, this place rules (please note: there is another Sipan in Buenos Aires but the one in Palermo serves lunch).
I made it a point to try and get empanadas wherever we went and was not ever disappointed. The flaky pastry dough filled with ham and cheese or lamb and beef goodness never dissappointed.  We stayed in the Retiro district at the Park Tower. It’s a really nice hotel that apparently only tourists go to (the only people we came into contact with at that five star hotel were American or Chinese, I suggest you go elsewhere if you want a more local feel). It has a gorgeous view of the Plaza de San Martin and is walking distance from one of the most monied areas in Buenos Aires, the Puerto Madero neighborhood. Walking through Puerto Madero is really pretty but if you’re anything like me, you view it as a lovely frontispiece for people I will never really know.
We went to dinner at a restaurant there that was by far the most expensive place we ate at with the least quality of service (six courses not that well thought out). We’re no strangers to fine dining but if you make someone wear a jacket, you better damn well pull out the lady’s chair (seriously, a guy kind of pulled it out and then left midway). You will be forgiven if your food is good, but if I can’t find the waiter for a good ten minutes to get some water with our not-that-amazing wine, I am going to take issue. It’s not even worth noting the name of said restaurant, suffice to say that you are better off eating at any of the other myriad restaurants. The service is lackluster and the food? Go elsewhere in the city, seriously (except for ice cream, people really like it in Puerto Madero). The waterways are gorgeous, but I didn’t see a murder, so not that interesting.
The Kavanagh Building. Retiro, Buenos Aires.

The Kavanagh Building. Retiro, Buenos Aires.

We ended up eating at Filo in the Retiro district one night and have to say, the octopus was again amazing. We thought the place a last ditch effort for ourselves (not helped by the bare-tittied manequin in the front), but had yet another really good meal. I think there are more restaurants in Argentina that serve pizza than in New York. Big Italian quotient, and they have a really nice ham laden pizza you can get anywhere and with a liter of quilmes (Argentina’s national beer), that kind of puts our outdoor places to shame. The octopus is not to be ignored. We had it several different ways before we went to a Spanish tapas place and decided to get (Spanish) octopus. It was a large octopus served with boiled potatoes and paprika. That’s it. I desired more from the dish because I’m American but the octopus was just as tender as it was in every place we had gone to.
When we went back to Montevideo for our last night in South America, we visited the Criolla del Solis.  We didn’t have offal. Instead, some chorizo and morcilla (too sweet for my taste), and the recommended ribeye which was honestly the best I can remember eating. So fucking good. We got on a plane the next afternoon, but I still want more chorizo. I have a feeling it won’t be the same until we go back to Sudo America. (Next up for travel: Vietnam andThailand vs. Greece and Turkey).
Love,
Yolo

Flour-less Almond Butter Cookies

10 Mar Flour-less Almond Butter Cookies
Flour-less Almond Butter Cookies

Flour-less Almond Butter Cookies

Dear Yolo,

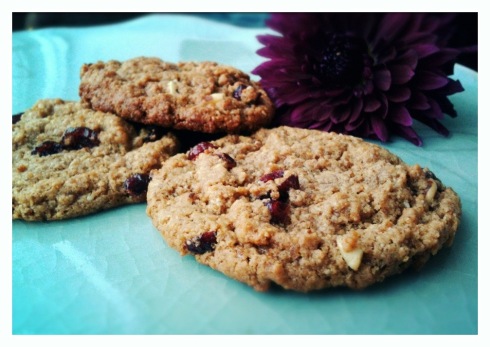
And now, because I love you, I will share my (and Roscoe’s) absolute most favorite cookie recipe which I made last night. Crispy on the edges, chewy in the middle. They’re incredibly delicious, fast and they don’t taste healthy but they are because there is no flour (they’re gluten free!), no dairy and you use sucanat instead of refined sugar.  I do notice a difference in my skin, energy levels, and overall health when I cut down on gluten, refined sugars, and processed foods but I hate feeling deprived. There are so many great recipes out there now that make eating clean actually taste like you’re eating dirrrrrrty.

I didn’t have any chocolate chips last night so I used dried cranberries. Something about the sucanat and the almond butter still tasted a little chocolatey and I liked the little bit of chewiness and brightness of the cranberries.

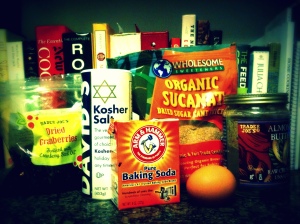
Roscoe's Almond Butter Cookies IngredientsSo aside from being gluten free, I like that this recipe uses sucanat (a contraction of sucre de canne naturel). If you’re not already familiar with it, it’s basically pure dried sugar cane juice. It has that brown sugar color but is granular in appearance and doesn’t have any of the vitamins or minerals taken out and it has a more pronounced molasses flavor. It has a lower glycemic index than refine sugar so you’ll notice that your body doesn’t experience the same sugar crash after eating these cookies.

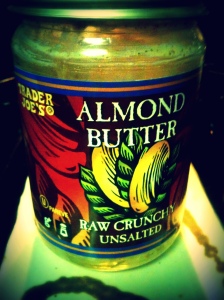
One note: I’ve tested several brands and I recommend using Trader Joe’s brand Raw Crunchy Unsalted Almond Butter for the moistest, chewiest, best tasting cookies. (It’s also a better value as almond butter can be pricey.) If you aren’t near a Trader Joe’s, just make sure you use a type of almond butter that is really oily. This has to do with the quality of nuts, roasted vs raw and how the butter is blended– I’m not talking about oil being added. The butter should be just appear very oily and loose and not dry.

Trader Joe's Raw Crunchy Unsalted Almond ButterFlour-less Almond Butter Cookies
adapted from Clean Eating Magazine

preheat oven to 350 degrees
1 c. Almond Butter
3/4 cup Sucanat (found in the baking or health food section of better grocery stores)
1 egg
1/2 tsp. baking soda
1/4 tsp. kosher salt
3 oz. dried cranberries, dark chocolate pieces, or whatever you like in your cookies

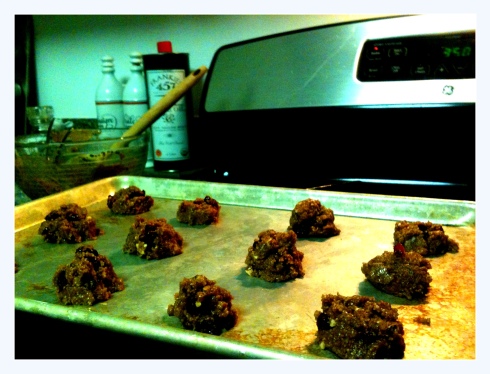
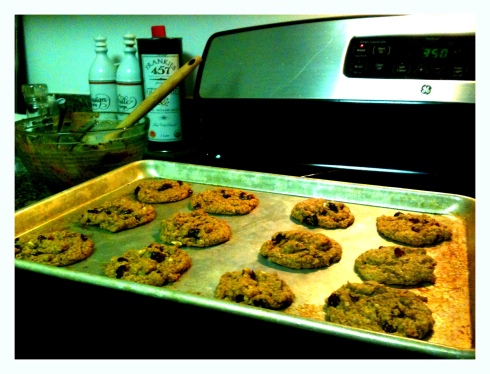
Mix together first five ingredients until blended. Add cranberries. Drop by rounded teaspoons on a baking sheet. Bake for 10-12 minutes. Cool for 5 minutes or more on the baking sheet (cookies will be very delicate and need to firm) before transferring to a wire rack or to the hungry people who have been gathering in your kitchen.

Yield 24 cookies.

Nutrients per cookie: Calories: 110, Total Fat: 8 g, Sat. Fat: 1.5 g, Carbs: 10 g, Fiber: 1 g, Sugars: 3 g, Protein: 2 g, Sodium: 55 mg, Cholesterol: 10 mg

Flourless Almond Butter Cookies Before

BEFORE

After

AFTER

I Heart Grahams

16 Feb

Dear Yolo,

I have no auditions and no castings today, and I am avoiding my taxes by obsessing over vintage sautoir necklaces on eBay. I’m pretty sure Roscoe will stage an intervention for me soon. Writing makes me feel ever so slightly more productive.

We went to Odam’s (Adam+Owen) apartment for dinner on Sunday. We were joined by their friend Ryan who is a photographer,  also awesome. He and his wife are having a little girl named Wren in a couple of months.

It was a fancy pizza party: homemade dough tossed with expertise acquired from a part-time job during art school and a delicious but super simple sauce made by Adam. Roscoe and I love a good Neopolitan pizza with anchovies, capers and fresh mozzarella but my favorite was a white pizza with mozzarella, taleggio, roasted yukon gold potatoes and rosemary. SO GOOD! I wish I had taken pictures.

I brought s’mores for dessert. I made the graham crackers and marshmallows myself, because I enjoy comparisons to Martha Stewart. Making the marshmallows was fun because I had no idea if I would be successful and it seemed kind of magical turning sugar water into fluffy, bouncy marshmallows. It really impressed people, because no one knows what marshmallows really are but the 1Tbsp of vanilla the recipe called for is way too much for those thangs. They’re killer in hot chocolate though. The graham crackers were phenomenal. Adam emailed me for the recipe the next day. I got both recipes from the Smitten Kitchen which is a food blog I like. I usually like my cookies (esp. chocolate chip) undercooked but don’t do that with these grahams because it affects the taste (not good). You read any food blogs regularly?

Graham Crackers
Recipe from the Smitten Kitchen.

If you’re new to graham crackers, do know that the word “cracker” is misleading. They’re moderately sweet, like a cookie or biscuit, but they do have the snap of a cracker. I can’t say that I’d serve them with cheese, but if you’ve never schmeared them with cream cheese frosting, you’re missing out.

The topping amount will make a heavy coating, like the store-bought ones. Make only half if you just want a light-to-moderate sprinkling.

Makes 10 4 x 4.5-inch graham crackers or 48 2-inch squares

2 1/2 cups plus 2 tablespoons (375 grams) unbleached all-purpose flour (a swap of 1/2 cup with whole wheat flour or 1 cup whole wheat pastry flour works well here, too)
1 cup (176 grams) dark brown sugar, lightly packed
1 teaspoon (6 grams) baking soda
3/4 teaspoon kosher or coarse sea salt (4 grams)
7 tablespoons (3 1/2 ounces or 100 grams) unsalted butter, cut into 1-inch cubes and frozen
1/3 cup (114 grams) mild-flavored honey, such as clover
5 tablespoons (77 grams) milk, full-fat is best
2 tablespoons (27 grams) pure vanilla extract

Topping (optional)
3 tablespoons (43 grams) granulated sugar
1 teaspoon (5 grams) ground cinnamon

Make the dough: Combine the flour, brown sugar, baking soda, and salt in the bowl of a food processor fitted with the steel blade or in the bowl of an electric mixer fitted with the paddle attachment. Pulse or mix on low to incorporate. Add the butter and pulse on and off on and off, or mix on low, until the mixture is the consistency of a coarse meal.

[Alternately, if you don’t have a food processor or electric mixer, you can cut the ingredients together with a pastry blender. Just make sure they’re very well incorporated.]

In a small bowl, whisk together the honey, milk, and vanilla extract. Add to the flour mixture and pulse on and off a few times or mix on low until the dough barely comes together. It will be very soft and sticky. Lay out a large piece of plastic wrap and dust it lightly with flour, then turn the dough out onto it and pat it into a rectangle about 1-inch thick. Wrap it, then chill it until firm, about 2 hours or overnight. Meanwhile, prepare the topping, if using, by combining the sugar and cinnamon in a small bowl and setting aside.

Roll out the crackers: Divide the dough in half and return one half to the refrigerator. Sift an even layer of flour onto the work surface and roll the dough into a long rectangle about 1/8 inch thick. The dough will be sticky, so flour as necessary. Trim the edges of the rectangle to 4 inches wide. Working with the shorter side of the rectangle parallel to the work surface, cut the strip every 4 1/2 inches to make 4 crackers. [This makes a traditional graham cracker shape. I rebelled and made mine into 2-inch fluted squares with one of these.]

Place the crackers on one or two parchment-lined baking sheets and sprinkle with the topping. Chill until firm, about 30 to 45 minutes in the fridge or 15 to 20 minutes in the freezer. Repeat with the second batch of dough. Finally, gather any scraps together into a ball, chill until firm, and re-roll.

Adjust the oven rack to the upper and lower positions and preheat the oven to 350°F.

Decorate the crackers: Mark a vertical line down the middle of each cracker, being careful not to cut through the dough (again, this is for the traditional cracker shape). Using a toothpick or skewer (I like to use the blunt end of a wooden skewer for more dramatic dots), prick the dough to form two dotted rows about 1/2 inch for each side of the dividing line.

Bake for 15 to 25 minutes, until browned and slightly firm to the touch, rotating the sheets halfway through to ensure even baking. [The baking time range is long because the original recipe calls for 25 minutes but my new oven — which I suspect runs crazy hot but have yet to confirm with the actual purchase of an oven thermometer — had them done in way less. Be safe, check them sooner. Nobody likes a burnt cracker!]