Archive | Food & Table RSS feed for this section

Homemade Maple Vinegar

1 Apr

Dear Yolo,

My absolute favorite thing that came from making homemade red wine vinegar is the one we made after it, maple vinegar. It makes food taste incredible and is fairly easy to make as well. The idea came originally from the book Ideas in Food, which anyone and everyone interested in the process of cooking should read. It is an ongoing experimental process with food by Chefs Aki Kamozawa and H. Alexander Talbot.

You need to start with some really good quality Grade A maple syrup. It’s expensive, but it is the best and substitutions really fall short. The list of the ingredients you’ll need are:

3 1/2 cups homemade red wine vinegar

3 cups grade A maple syrup

1 1/2 cups dark rum (gosling’s or any you approve of)

3/4 cup filtered water

Combine all and store in a dark place for a few weeks. Transfer as needed to a bottle with a pour spout or stopper and use on whatever you like (the recipe makes quit a bit). Maple vinegar can lift an ordinary pork tenderloin to heights of amazingness. I love it on pan roasted carrots and brussels sprouts. It gives many ordinary foods that extra umami flavor.  I’ll post some recipes in the future.

If you don’t feel like going through the process of making your own or you want to try a store-bought version first, you can always buy some at Dean and Deluca:

John Boyajian’s Malple Vinegar $8.50 for 8 oz.

Or you can go the more exotic and gourmet route and purchase some from Mikuni Wild Harvest (all of their products look pretty awesome):

Tonic 03: Maple Matured Sherry Bourbon Oak Vinegar $22.95 for 400ml

Enjoy!

Love,

Yolo

Maroon’s Mini Herb Garden

26 Mar Heirloom Herb Seeds

Maroon's Mini Herb Garden

Dear Yolo,

For a number of reasons, I now have two little mini-greenhouses with tiny plants in our apartment.

  1. As much as I try to fight it, I am a native of the Evergreen State so living in the concrete jungle of New York is especially hard on my aesthetic sensibilities.  East Coast deciduous trees make winter look especially bleak.
  2. Plants are cute!
  3. I hate buying herbs. It just pisses me off.
  4. Both of my grandparents had/have lovely gardens where they grew vegetables, herbs, flowers and all sorts of things. I loved working in their gardens with them when I was a kid. I felt a lot of affection for earthworms because I knew they were good for the soil and help plants grow and named each one I found “Charlie”. I liked to pretend that each time I found an earthworm it was the same one.
  5. It is socially acceptable to hoard plants. Many people even admire this sort of behavior.

During our last trip to Ikea, I bought two little mini-greenhouse type structures. Not really necessary, but being part Japanese means it’s hard for me to resist anything in miniature scale. I dragged back a bag of soil from Target and have been using jars, a mismatched wineglasses and little pots mugs or planters picked up from Goodwill to give my little garden a home.

One of the mini greenhouses is more or less dedicated to herbs while the other is a home for my succulent plants. I love succulents because they are difficult to kill (they basically require neglect) and they’re so cool looking.

Also, we eat a lot of guacamole so while I don’t put all the seeds to use, I do have two one-year-old avocado trees thriving with two more I have just started in small jars and am waiting to sprout. I think they will actually make nice housewarming gifts for friends because most people who come over stare longingly at the tiny trees.

Maroon's Mini Garden

I feel like I’m 10 years old again, because I find it pretty exciting to plant some seeds and then see them sprout a week or two later.  I’m sure this sounds totally stupid to some people, but as a person who has lived in urban environments for many years, seeing a plant grow is (sadly) really cool!

So far I have basil, cilantro (I know, sorry– you hate it), parsley and rosemary growing. I also have some seeds for thyme but I need to go get more soil. Not looking forward to that because the bag is heavy.

I’m especially excited about the purple opal basil I planted. The little sprouts are kind of greenish/purple right now, but they’re supposed to become this brilliant purple when full grown. More food should be purple. I’ll have to update with more pictures.

Tata for now– someone has to go to the doctor’s office so I’m filling in for a few hours at the wine store this afternoon and I need to get ready. Also, sorry my pics are kinda sucky. I left my phone at a restaurant on Friday and it looks like someone took it. Haven’t done that for YEARS. So pissed about it.

How was your weekend?

Love,

Maroon

Maroon's Mini Garden

Sunday Roast Chicken

25 Mar Sunday Roast Chicken
Sunday Roast Chicken

Mmmmmmm...

Dear Yolo,

Lately, having roast chicken on Sunday has become a tradition. It’s a healthy, delicious, simple, EASY!  meal and the leftover chicken meat stretches into sandwiches, pastas and snacks for a a few days after.

You’re no stranger to chicken roasting but for those who haven’t tried it, I strongly encourage you to. I know you can buy those ready-to-eat rotisserie chickens at the supermarket but it doesn’t compare to the taste of a chicken you roast yourself. Because there IS a difference in taste (and your peace of mind) I pick the biggest organic, free-range chicken I can find.  It’s a lovely ritual, and the results will make you feel like a kitchen god.

I’m sharing the recipe I use which is Thomas Keller’s Favorite Roast Chicken.  I love how he writes the recipe and how to enjoy the bird. There aren’t many things that feel cozier than enjoying (or sharing) the oysters of a freshly carved chicken. While I usually adapt recipes, I’ve reproduced this in its entirety because you just have to hear it straight from Keller. This is a man who knows how to enjoy a roast chicken.

To keep it healthy, I don’t serve the chicken with butter. We usually enjoy it alongside a salad or a couple of veg dishes.

Thomas Keller’s Favorite Roast Chicken
 from Gourmet Magazine (RIP!)

  • One 2- to 3-pound farm-raised chicken
  • Kosher salt and freshly ground black pepper
  • 2 teaspoons minced thyme (optional)
  • Unsalted butter
  • Dijon mustard

Preheat the oven to 450°F. Rinse the chicken, then dry it very well with paper towels, inside and out. The less it steams, the drier the heat, the better.

Trussed and ready for the ovenSalt and pepper the cavity, then truss the bird. Trussing is not difficult, and if you roast chicken often, it’s a good technique to feel comfortable with. When you truss a bird, the wings and legs stay close to the body; the ends of the drumsticks cover the top of the breast and keep it from drying out. Trussing helps the chicken to cook evenly, and it also makes for a more beautiful roasted bird. (Click here for a tutorial.)

Now, salt the chicken—I like to rain the salt over the bird so that it has a nice uniform coating that will result in a crisp, salty, flavorful skin (about 1 tablespoon). When it’s cooked, you should still be able to make out the salt baked onto the crisp skin. Season to taste with pepper.

Place the chicken in a sauté pan or roasting pan and, when the oven is up to temperature, put the chicken in the oven. I leave it alone—I don’t baste it, I don’t add butter; you can if you wish, but I feel this creates steam, which I don’t want. Roast it until it’s done, 50 to 60 minutes. Remove it from the oven and add the thyme, if using, to the pan. Baste the chicken with the juices and thyme and let it rest for 15 minutes on a cutting board.

Remove the twine. Separate the middle wing joint and eat that immediately. Remove the legs and thighs. I like to take off the backbone and eat one of the oysters, the two succulent morsels of meat embedded here, and give the other to the person I’m cooking with. But I take the chicken butt for myself. I could never understand why my brothers always fought over that triangular tip—until one day I got the crispy, juicy fat myself. These are the cook’s rewards. Cut the breast down the middle and serve it on the bone, with one wing joint still attached to each. The preparation is not meant to be superelegant. Slather the meat with fresh butter. Serve with mustard on the side and, if you wish, a simple green salad. You’ll start using a knife and fork, but finish with your fingers, because it’s so good. (Click here for a video tutorial on carving a chicken.)

Try and tell me that doesn’t sound good. Enjoy. 🙂

Love,

Maroon

Homemade Red Wine Vinegar

23 Mar Homemade red wine vinegar

Homemade red wine vinegar

Dear Maroon,I adore homemade vinegars because they usually taste better and after you’ve done it once, it pays for itself. Here’s a recipe for homemade red wine vinegar that can be used in the chimichurri and criolla recipes from an earlier post. It’s pretty damn simple.

Homemade Red Wine Vinegar:

2 cups of apple cider vinegar with the mother (you can find raw apple cider with the mother at health food stores)

3 cups red wine (we use a collection of unfinished bottles of wine from the previous week or two)
1 large glass jar
1 paper towel
1 large rubber band

Combine wine and vinegar in the jar. Cover with the paper towel and secure with the rubber band. Place in a dark, room temperature place (60-80 degrees ideal) for two weeks. Strain and transfer to a glass bottle (I like one with a pour spout). Let stand another week for flavors to mature and mellow. Use as you would any store bought red wine vinegar.

This vinegar is much more pronounced in nuanced flavor than store-bought versions. The real draw in doing this is that you can reserve a portion of the mother (unstrained, don’t be afraid – it looks like a gelatinous mass) and keep adding small batches of wine weekly to have a never-ending supply. Wine recycling!

Love,

Yolo
Here is the gelatinous mass that is the mother of the red wine vinegar:
Red Wine Vinegar Mother

The Finest Meats & Cheese (mostly meats): Chimichurri & Criolla Sauce

20 Mar Criolla in Montecito
Dear Maroon,
One of my favorite things about South America is their ability to produce the finest meats the world over. Yes, I said it. South America has arguably the best beef and sometimes lamb in the world (also octopus, more on that later). I now endeavor to take you through our culinary experience in Argentina and Uruguay and because I travel with a chef, that seems to be the first and foremost way we experience everything, through food. Our first stop was Montevideo, Uruguay on our trip and that city is beautiful. It’s rife with historical buildings and situated on some very lovely beaches. I couldn’t change currency in the states before going there so we had to take out money at an ATM. The interesting thing about cab drivers or anyone else in Uruguay is that they hate making change for your bills and often won’t do it, to the point where they either berate you for such a large bill or give you a slightly lesser price so they don’t have to make change. I have no fucking clue how that country operates on cash. We went to the old district our first night and ate at the criolla del solis. A criolla is basically the same as a parilla, but Uruguayan. It basically refers to meat cooked on the type of grill they have and holy shit, it is awesome. In a really good (or sometimes mediocre) restaurant you will see said grill cooking your meats (a very large grill often on hydraulics to lift up and tend to the coals). Quick note because I am used to Mexican Spanish: people in Argentina speak Castellano, not “Spanish” and the double “ll” is pronounced not with a “y” sound but, well the closest thing I can approximate it to is the first sound of something like “je m’apelle”.Anyhow, our first night we started with an appetizer platter of offal. Sweetbreads, liver, morcilla (blood sausage) and some chorizo. The chorizo in Uruguay is the best I’ve ever had and I crave it to this day. It is slightly crispy on the outside and bursting with succulent deliciousness on the inside. It is nothing like Mexican or even Spanish chorizo and it is divine (somewhat akin to German braut, but not really). We had a baked potato with blue cheese to supplement our meat dinner and even the potatoes are better in South America….as they should be since that is their origin).The morning after we had lunch at the famed market near the port and sure as shit, there were meats everywhere. The building itself is beautiful, but eating at some of the “restaurant” style places there proved to be more expensive than it was worth (thanks tourism). Anyhow, it was right near the buquebus (ferry) that we took to Bueno Aires.The first night we were in Buenos Aires was Valentine’s Day. For some reason, I didn’t expect Argentina to recognize that Hallmark holiday, but they do. We had made reservations in advance at a restaurant in the boutique Hotel Fierro called Hernan Giopponi. You should check out the hotel’s blog.  Our pre-set six course Valentine’s meal was good and certainly interesting, but the best thing is that hotel’s blog. Last July there was an event called the “Taste of Titus Andornicus”, which, well you should just read about. I would’ve loved to go to that. Shakespearean play where diners can engage in the final food fight scene? Yes, please.

The next day we flew into Bariloche, Patagonia. We had a really good evening consisting of Patagonian lamb, empanadas and wine our first night in Bariloche. The nice thing is that Argentina isn’t big on importing wines (they’re governmental structure is a whole other thing), but that means you can enjoy wines for significantly less than we would get them (read:cheap, they don’t upmark by three times like we do in the states). We had amazing Malbecs the whole time and got tipped off to the best parilla in Bariloche on our second night.

Alberto's, our zip lining British friend's favorite restaurant in the world

We went ziplining with some Brits who now live in Scotland and the woman wanted to come back to Bariloche because it had her favorite restaurant in the world,  Alberto’s.  There is a parilla and pasta place of the same name (the pastas are really good and saucy). They also did an amazing provolone grilled on one side and brushed with oil and then situated on the parilla in a dish. I don’t think locals want anyone to know about Alberto’s because it is primarily dominated by locals and when we mentioned it to the guy at our front desk he seemed to want to talk about it only hushed tones. Sorry locals, but if you have come to our site it is only because we really appreciate your things.

Amazing food once again, but the best criolla and chimichurri actually came from the farm we were at during our rafting adventure. Brian has made a modern version of which I will share with you:

Chimichurri

2 cups picked Italian parsley
3/4 cup picked fresh oregano
2 large garlic cloves, finely grated
2 tsp. red chili flake
3 T red wine vinegar (preferably homemade, get the recipe here)
1/2 cup canola oil (typically a neutral flavored oil is used, but olive oil can be substituted)
salt and freshly ground black pepper to tasteFinely chop the parsley and oregano or process in a food processor several pulses. Combine remaining ingredients, mixing well. Season to taste. Let marinate for at least 1 hour and use within a few days. Serve over a grilled steak or spoon onto good bread.Note that the above recipe is not exact and requires the producer of said recipe to taste at intervals.

Those were basic notes from the recipes, but like all good savory recipes, require the chef to taste as they see fit. Also, sometimes it calls for cilantro, which I still vehemently hate. Add at will. I’ve found that in an American take on Mexican or South American food there is always an abundance of cilantro. I have rarely seen it on my travels: this is something American people want to project onto other international cuisines. I still fucking hate cilantro. I tried, and actually went so far as to test my reactions with varying different types of coriander. Fact: I love ground coriander. Fact: when it blossoms into a plant whose leaves are picked and put into a sauce I would otherwise love, I hate it. I am not alone. Julia Child hated cilantro. When it is cooked above 160 degrees Farenheit I don’t really taste it and therefore don’t hate it.

Criolla Sauce

1 medium onion, small dice

1 red pepper, seeded, small dice
1 roma tomato, seeded, small dice
1 clove garlic finely minced or grated
2 T chopped parsley
1/4 cup red wine vinegar (homemade if possible)
1/2 cup canola oil
salt and pepper to tasteCombine all ingredients and mix well. Best served the next day after marinating for a while. Will hold covered for up to a week. Is great with grilled steaks or sausages or on bread.These sauces are very fundamental flavors of Argentina and Uruguay and can be used creatively if one wishes.

Tales of adventures to be continued…Yolo

Flour-less Almond Butter Cookies

10 Mar Flour-less Almond Butter Cookies
Flour-less Almond Butter Cookies

Flour-less Almond Butter Cookies

Dear Yolo,

And now, because I love you, I will share my (and Roscoe’s) absolute most favorite cookie recipe which I made last night. Crispy on the edges, chewy in the middle. They’re incredibly delicious, fast and they don’t taste healthy but they are because there is no flour (they’re gluten free!), no dairy and you use sucanat instead of refined sugar.  I do notice a difference in my skin, energy levels, and overall health when I cut down on gluten, refined sugars, and processed foods but I hate feeling deprived. There are so many great recipes out there now that make eating clean actually taste like you’re eating dirrrrrrty.

I didn’t have any chocolate chips last night so I used dried cranberries. Something about the sucanat and the almond butter still tasted a little chocolatey and I liked the little bit of chewiness and brightness of the cranberries.

Roscoe's Almond Butter Cookies IngredientsSo aside from being gluten free, I like that this recipe uses sucanat (a contraction of sucre de canne naturel). If you’re not already familiar with it, it’s basically pure dried sugar cane juice. It has that brown sugar color but is granular in appearance and doesn’t have any of the vitamins or minerals taken out and it has a more pronounced molasses flavor. It has a lower glycemic index than refine sugar so you’ll notice that your body doesn’t experience the same sugar crash after eating these cookies.

One note: I’ve tested several brands and I recommend using Trader Joe’s brand Raw Crunchy Unsalted Almond Butter for the moistest, chewiest, best tasting cookies. (It’s also a better value as almond butter can be pricey.) If you aren’t near a Trader Joe’s, just make sure you use a type of almond butter that is really oily. This has to do with the quality of nuts, roasted vs raw and how the butter is blended– I’m not talking about oil being added. The butter should be just appear very oily and loose and not dry.

Trader Joe's Raw Crunchy Unsalted Almond ButterFlour-less Almond Butter Cookies
adapted from Clean Eating Magazine

preheat oven to 350 degrees
1 c. Almond Butter
3/4 cup Sucanat (found in the baking or health food section of better grocery stores)
1 egg
1/2 tsp. baking soda
1/4 tsp. kosher salt
3 oz. dried cranberries, dark chocolate pieces, or whatever you like in your cookies

Mix together first five ingredients until blended. Add cranberries. Drop by rounded teaspoons on a baking sheet. Bake for 10-12 minutes. Cool for 5 minutes or more on the baking sheet (cookies will be very delicate and need to firm) before transferring to a wire rack or to the hungry people who have been gathering in your kitchen.

Yield 24 cookies.

Nutrients per cookie: Calories: 110, Total Fat: 8 g, Sat. Fat: 1.5 g, Carbs: 10 g, Fiber: 1 g, Sugars: 3 g, Protein: 2 g, Sodium: 55 mg, Cholesterol: 10 mg

Flourless Almond Butter Cookies Before

BEFORE

After

AFTER

Dulce de Leche

9 Mar Dulce de Leche

Dear Maroon,

High tea in Argentina often involves alfajores which are pretty much shortbread cakes with dulce de leche. We never had any while we were there but I am obsessed with dulce de leche even more than before. Brian just made some at home today and I cannot stop eating it. I’ve tried tricking or berating myself into stopping, to no avail. Here’s how to indulge with me:

It’s pretty simple:

Dulce de LecheDulce de Leche

1 quart raw organic whole milk (raw milk is really important – I think the pasteurization process kills some of the amazing taste)

1 1/2 cups sugar

1/2 teaspoon baking soda

Cook on low heat (no lid) for an hour or two until you start to see color. Turn down the heat if it starts to boil over. Once you start to see color add:

1 14oz. can sweetened condensed milk

Cook more until it caramelizes. The darker it gets the more you have to stir it so that it doesn’t burn. Once it is caramel colored strain it and cool it. That’s about it. Enjoy the milk jammy goodness on whatever you like (within reason…you should probably stick to breads or fruit and not put it on fish or vegetables – just sayin’). Going to eat more now.

Yolo

Two Dessert Rule: Amaretti Cookies

26 Feb

Dear Yolo,

I’m every so slightly fuzzy brained this morning as last night we the Hurtys over for dinner and I drank oodles of wine. The husband Bernard is a friend of Roscoe’s from cycling and his wife Phoebe is a writer. They’ve lived in Brooklyn for a million years. We’ve been to their house a couple times (they live in the most gorgeous brownstone in Park Slope) and we were finally able to coax them over to our apartment. They’re really lovely people, both so intelligent, interesting, lively and idiosyncratic and they are SUCH a cute couple. They just celebrated their 29th anniversary and you can still tell how much they love eachother. Not in a gross or obvious way.  They’re what Kurt Vonnegut describes as a “duprass” in Cat’s Cradle if I remember correctly.

For my part, I think the guests felt welcome, the kitchen wasn’t a wreck, and while we had several courses, I don’t think it looked like I was working too hard. And, the results of my labor were well received by our gracious guests so I think I count the evening as a success.

As is my custom, I made two desserts.  This way, if dinner sucks, everyone can just fill up on dessert. Everyone loves dessert! AND, as I like to try out experimental recipes on new victims guests if I make two desserts, I can be fairly certain at least one of them will turn out okay. Plus, two desserts feels decadent and fancy and scores me big points with anyone who was raised, as I was, to equate food with affection. I am so simple. I can’t believe I wasn’t abducted as a child.

Last night was one occasion where I was relieved I made two desserts. I tried making a Tangerine Bavarian which I thought would be light and refreshing. Bavarians are one of those weird desserts in the back of The Joy of Cooking and Julia Child’s books that I’ve always wanted to try. I understand it had its heyday as a sophisticated dessert in the 60’s and since has fallen into relative obscurity. It’s essentially fancy-pants custardy Jello.

I couldn’t find tangerines so I used oranges and I must have overcooked the custard because it ended up tasting very eggy. And that eggy-orangey taste combo? Not good. Darren even said he liked it but I thought it was gross– I couldn’t eat it. The accompanying Tangerine Caramel Sauce made it slightly better because of it’s strong flavor, but while the sauce was interesting (a Bay leaf was involved) it still wasn’t what I would call good. I kind of want to give the Bavarian another crack– maybe a more basic flavor like chocolate which seems like it would be harder to screw up but possibly they’re just gross and that’s the reason no one ever makes them.

All this would have been traumatizing but I had baked some Amaretti this morning as dessert #2 to serve alongside the Bavarian. I like mine a little chewy and these are certainly that. Plus, they’re way easy to make and there’s no flour. It’s a one bowl food processor affair.

I whipped a first batch of whipped cream with zest to be folded into the custard for the Bavarian a little too long (it hadn’t turned into butter yet but was just a little too stiff) so I put it aside and used that as filling and made little macaron style sandwich cookies. They were a hit and Phoebe asked for the recipe.

I have photographed them here with Bernard’s placemat that he colored because it’s awesome and Roscoe and I agree the best placemat a guest of ours has ever colored.  So 2012. So now.

And now the recipe. 🙂

Amaretti Cookies
Chewy, sweet, flourless Italian almond cookies.
Adapted from Gourmet, January 2009

Similar to macarons but much easier to make! I don’t have a pastry bag, so I roll hood-style with this and use a ziplock sandwich bag and cut one of the corners.

Yield: About four dozen cookies, or half as much if you sandwich them

1 (7-ounce) tube pure almond paste (not marzipan; 3/4 cup)
1 cup sugar
Pinch of Kosher salt
2 large egg whites at room temperature for at least 30 minutes

Preheat oven to 300°F and place racks in the upper and lower thirds of your oven. Line two large sheet pans with parchment paper.

Pulse almond paste, sugar and salt in a food processor until broken up, then add egg whites and puree until smooth. Transfer batter to pastry bag  fitted with a 3/8-inch tip and pipe 3/4-inch rounds (1/3 inch high) about 1-inch apart in pans. Dip a fingertip in water and gently tamp down any peaks.

Bake, rotating and switching position of pans halfway through, until golden and puffed, 15 to 18 minutes.

[These will puff up, so do leave that 1″ between.]

Let cookies cool almost completely in their pans. Once cool, they’re much easier to cleanly remove from the parchment. You can make them into sandwich cookies by spreading some jam between them. You can also use (as I did) stiffly whipped cream with some zest or liquor to flavor or ganache (3 ounces of semi-sweet chips melted with 1 to 2 tablespoons of cream, then left to thicken a bit would be enough to sandwich the whole batch).

Cookies can be kept in an airtight container at room temperature for a day or two or frozen up to one month.

Setting the Table at Downton Abbey

20 Feb

This slideshow requires JavaScript.

Dear Yolo,

We have Downton Abbey madness. Maggie Smith is the SHIT, son! One of the little details I love about the show is the lavish, ritualistic dinners. It’s giving me positively evil ideas about what to put on my our wedding registry.

Here are the some pieces I would use to set my table for the bourgeois version of a Grantham dinner. I’ve provided a couple options, one aspirational and one more easily attainable. As for the guests: formal attire, gentile appetite, dry sense of humor and starched underpants required.

As a bonus, here’s a Daily Mail article about the research that goes into executing the DA dinner scenes. I tried to get Roscoe to agree to a Downtown Abbey themed wedding, but he said no. Blast!

Ta.

Maroon

Aspirational: Marie Antoinette Dinnerware by Reynaud. $539 5-piece Place Setting at Gracious Style.com
Attainable: Anna Weatherly Simply Elegant Gold Dinnerware. $188 5-piece Place Setting at Gumps.com

Aspirational: Apple Placecard Holders by Ercuis. $159 Set of 6 at  Gracious Style.com
Attainable: Love Bird Cardholders with Brushed Silver Finish. $20.90 Set of 8 at Amazon.com

Aspirational: Tiffany & Co Silver Salt Cellar and Footed Pepper Shaker. $152 at eBay.com
Attainable: Vintage Silverplate Open Salt Cellar Set with Lion head. $42.95 at Etsy.com

Aspirational: Wedgwood Stemware, Knightsbridge Platinum Collection. $43-$50 at Macys.com
Attainable: Vintage Pineapple Cut Stemware. $24 Set of 8 at Etsy.com 

Aspirational: International Silver “Joan of Arc” Sterling Silver 5-Piece Place Setting. $725 at Macys.com
Attainable: Hampton Forge Flatware, Kingsley Gold. 45 Piece Set $130 at Macys.com

Vintage Gold & Silver Candelabra. $122 at Etsy.com

I Heart Grahams

16 Feb

Dear Yolo,

I have no auditions and no castings today, and I am avoiding my taxes by obsessing over vintage sautoir necklaces on eBay. I’m pretty sure Roscoe will stage an intervention for me soon. Writing makes me feel ever so slightly more productive.

We went to Odam’s (Adam+Owen) apartment for dinner on Sunday. We were joined by their friend Ryan who is a photographer,  also awesome. He and his wife are having a little girl named Wren in a couple of months.

It was a fancy pizza party: homemade dough tossed with expertise acquired from a part-time job during art school and a delicious but super simple sauce made by Adam. Roscoe and I love a good Neopolitan pizza with anchovies, capers and fresh mozzarella but my favorite was a white pizza with mozzarella, taleggio, roasted yukon gold potatoes and rosemary. SO GOOD! I wish I had taken pictures.

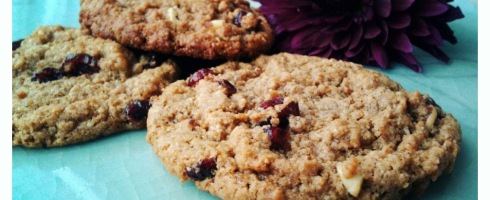
I brought s’mores for dessert. I made the graham crackers and marshmallows myself, because I enjoy comparisons to Martha Stewart. Making the marshmallows was fun because I had no idea if I would be successful and it seemed kind of magical turning sugar water into fluffy, bouncy marshmallows. It really impressed people, because no one knows what marshmallows really are but the 1Tbsp of vanilla the recipe called for is way too much for those thangs. They’re killer in hot chocolate though. The graham crackers were phenomenal. Adam emailed me for the recipe the next day. I got both recipes from the Smitten Kitchen which is a food blog I like. I usually like my cookies (esp. chocolate chip) undercooked but don’t do that with these grahams because it affects the taste (not good). You read any food blogs regularly?
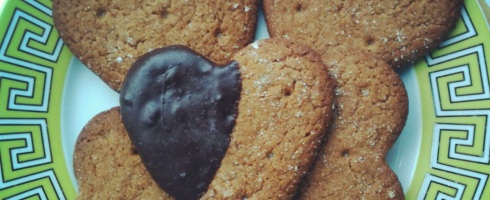
Graham Crackers
Recipe from the Smitten Kitchen.

If you’re new to graham crackers, do know that the word “cracker” is misleading. They’re moderately sweet, like a cookie or biscuit, but they do have the snap of a cracker. I can’t say that I’d serve them with cheese, but if you’ve never schmeared them with cream cheese frosting, you’re missing out.

The topping amount will make a heavy coating, like the store-bought ones. Make only half if you just want a light-to-moderate sprinkling.

Makes 10 4 x 4.5-inch graham crackers or 48 2-inch squares

2 1/2 cups plus 2 tablespoons (375 grams) unbleached all-purpose flour (a swap of 1/2 cup with whole wheat flour or 1 cup whole wheat pastry flour works well here, too)
1 cup (176 grams) dark brown sugar, lightly packed
1 teaspoon (6 grams) baking soda
3/4 teaspoon kosher or coarse sea salt (4 grams)
7 tablespoons (3 1/2 ounces or 100 grams) unsalted butter, cut into 1-inch cubes and frozen
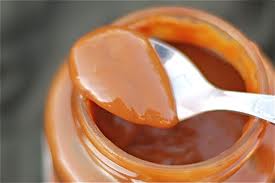
1/3 cup (114 grams) mild-flavored honey, such as clover
5 tablespoons (77 grams) milk, full-fat is best
2 tablespoons (27 grams) pure vanilla extract

Topping (optional)
3 tablespoons (43 grams) granulated sugar
1 teaspoon (5 grams) ground cinnamon

Make the dough: Combine the flour, brown sugar, baking soda, and salt in the bowl of a food processor fitted with the steel blade or in the bowl of an electric mixer fitted with the paddle attachment. Pulse or mix on low to incorporate. Add the butter and pulse on and off on and off, or mix on low, until the mixture is the consistency of a coarse meal.

[Alternately, if you don’t have a food processor or electric mixer, you can cut the ingredients together with a pastry blender. Just make sure they’re very well incorporated.]

In a small bowl, whisk together the honey, milk, and vanilla extract. Add to the flour mixture and pulse on and off a few times or mix on low until the dough barely comes together. It will be very soft and sticky. Lay out a large piece of plastic wrap and dust it lightly with flour, then turn the dough out onto it and pat it into a rectangle about 1-inch thick. Wrap it, then chill it until firm, about 2 hours or overnight. Meanwhile, prepare the topping, if using, by combining the sugar and cinnamon in a small bowl and setting aside.

Roll out the crackers: Divide the dough in half and return one half to the refrigerator. Sift an even layer of flour onto the work surface and roll the dough into a long rectangle about 1/8 inch thick. The dough will be sticky, so flour as necessary. Trim the edges of the rectangle to 4 inches wide. Working with the shorter side of the rectangle parallel to the work surface, cut the strip every 4 1/2 inches to make 4 crackers. [This makes a traditional graham cracker shape. I rebelled and made mine into 2-inch fluted squares with one of these.]

Place the crackers on one or two parchment-lined baking sheets and sprinkle with the topping. Chill until firm, about 30 to 45 minutes in the fridge or 15 to 20 minutes in the freezer. Repeat with the second batch of dough. Finally, gather any scraps together into a ball, chill until firm, and re-roll.

Adjust the oven rack to the upper and lower positions and preheat the oven to 350°F.

Decorate the crackers: Mark a vertical line down the middle of each cracker, being careful not to cut through the dough (again, this is for the traditional cracker shape). Using a toothpick or skewer (I like to use the blunt end of a wooden skewer for more dramatic dots), prick the dough to form two dotted rows about 1/2 inch for each side of the dividing line.

Bake for 15 to 25 minutes, until browned and slightly firm to the touch, rotating the sheets halfway through to ensure even baking. [The baking time range is long because the original recipe calls for 25 minutes but my new oven — which I suspect runs crazy hot but have yet to confirm with the actual purchase of an oven thermometer — had them done in way less. Be safe, check them sooner. Nobody likes a burnt cracker!]